|
Move Multiple Robots at the Same Time In this lesson, you will learn how to move more than one robot at the same time using special blocks called "non-blocking" blocks. This video shows how these blocks let the robots move or turn without waiting, and how to use a moveWait block to make sure the robots finish moving before the program ends. You will also learn how turning off the trace line can help everything run more smoothly when multiple robots are moving.
1. Non-Blocking Code Blocks Normally, when a program runs, RoboBlocky finishes one block before starting the next. This means robots take turns moving, one after the other. But what if you want more than one robot to move at the same time? You can do this using special blocks called "non-blocking" blocks. 
2. The moveWait Block To make sure the program waits until all robots are done moving, we use another block called moveWait. This block tells RoboBlocky to wait until all the non-blocking movements are finished before ending the program. Without moveWait, robots might stop moving before they are supposed to.


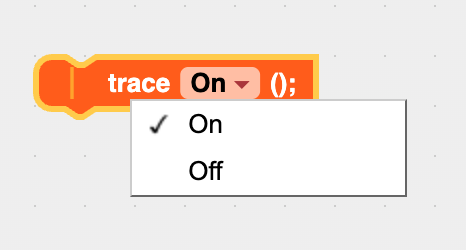
When using non-blocking blocks, it is a good idea to turn off the robot’s trace line. This helps everything run more smoothly, especially if more than two robots are moving at once. You can turn off the trace with the trace on/off block. 
4. The turnNB Block The turn block has a non-blocking version: turnNB. This works similar to the driveDistanceNB block. The turnNB block lets the robot turn while the next block runs at the same time. You can see this in Example 4.
|
|
This example drives Robot 1 and Robot 2 forward 4 inches at the same time. |
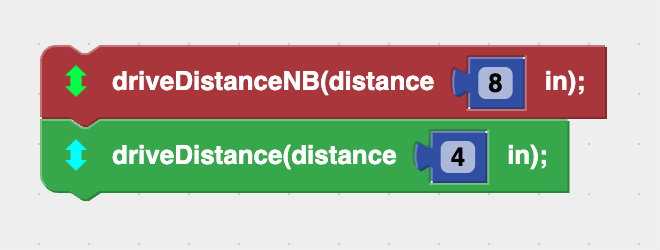
This example makes Robot 1 and Robot 2 move at the same time. Robot 1 is supposed to go 8 inches, and Robot 2 goes 4 inches. But the moveWait block is not used. So when Robot 2 finishes moving, the program stops early, and Robot 1 does not finish driving the full 8 inches. |
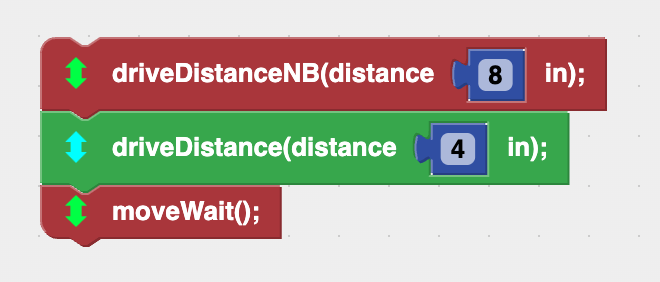
This example is almost the same as Example 2, but it adds a moveWait block at the end. This makes sure both robots finish moving before the program ends. Robot 1 moves the full 8 inches, and Robot 2 moves 4 inches. |
This example uses non-blocking driveDistanceNB and turnNB blocks so that both robots move at the same time. The robots do the same actions together, so moveWait blocks are not needed. |


