|
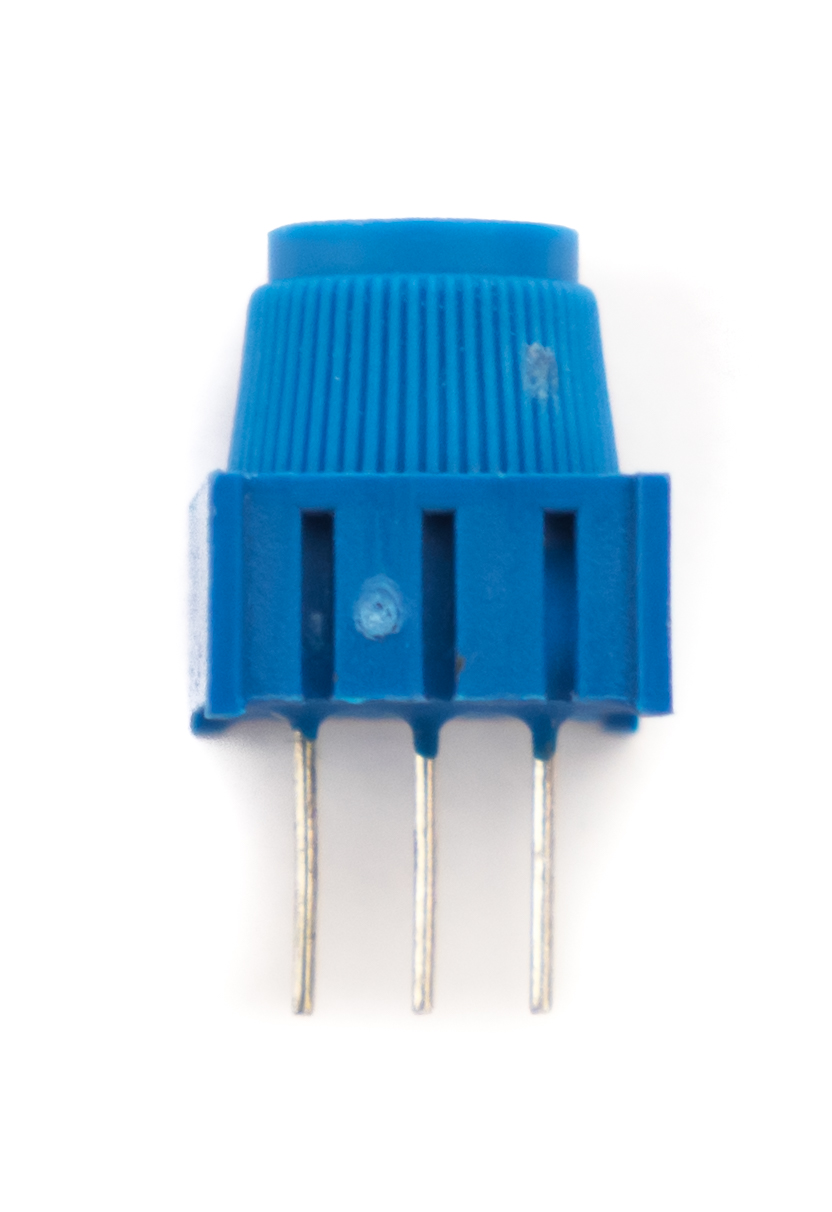
1. What is a Potentiometer? A potentiometer is a device that allows us to create a sliding-scale knob. The potentiometer pictured below has three pins in a triangular arrangement on the bottom and a knob on top:
If we connect an LED to the potentiometer, turning the knob allows us to change the voltage for the LED, which in turn causes the LED to grow brighter or dimmer (brighter for a higher voltage, dimmer for a lower voltage).
2. Analog Devices vs. Digital Devices Because a potentiometer allows for a continuous, sliding-scale voltage, it is an analog device (as opposed to a digital device, which operates with just two voltages, high and low).
3. Writing To and Reading From Analog Devices We use the digitalWrite code block to control a digital device. For an analog device, we use the analogWrite block:
analogWrite can be used on any Pulse-width modulation pin on the Arduino board (digital pins 3, 5, 6, 9, 10, and 11). analogRead reads a voltage from the Arduino's analog pins only. When it reads a voltage between 0V and 5V, it will convert it to an integer value between 0 and 1023 (where 5V corresponds to 1023). For a potentiometer, the middle pin is the pin we read from and write to.
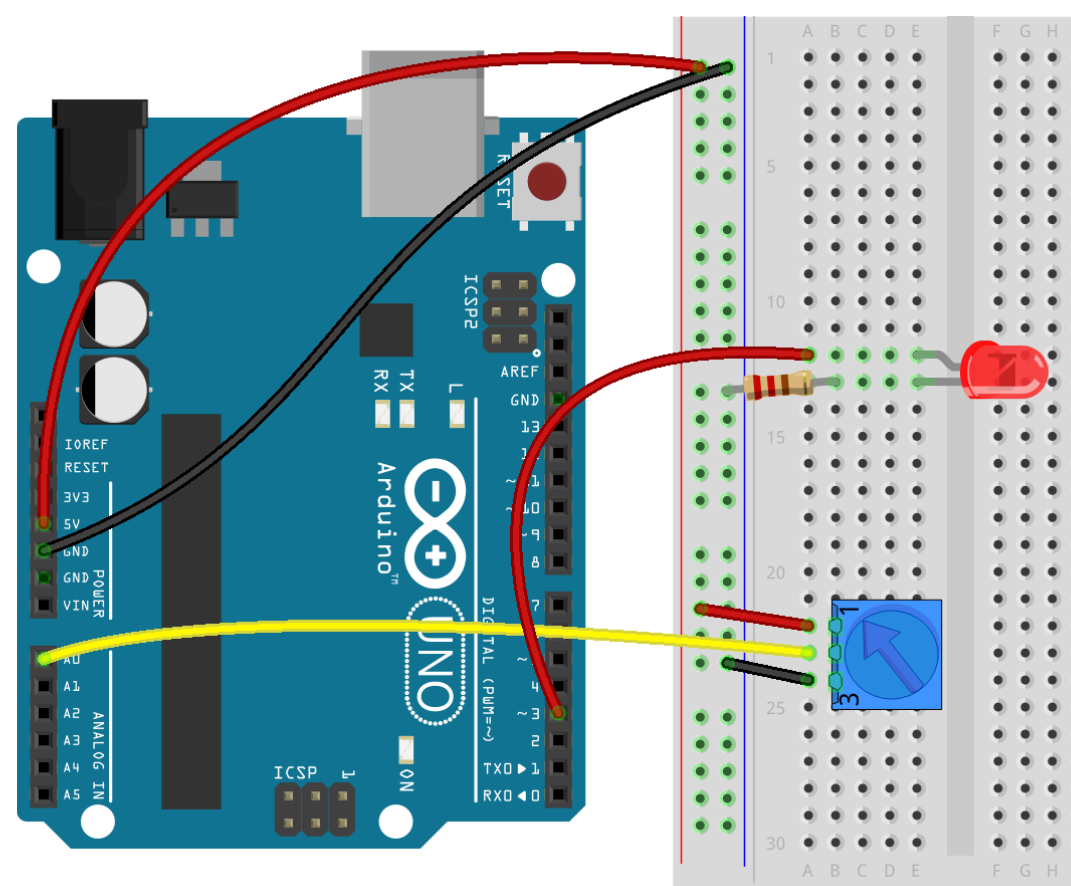
4. Creating a Circuit with a Potentiometer to Control an LED's Brightness We can use a breadboard to create a circuit with a potentiometer and LED. Turning the knob on the potentiometer will change the brightness of the LED's light. Here's what the circuit looks like:
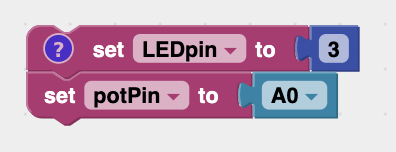
5. The Code to Control the Potentiometer To write a program that uses a potentiometer to control the brightness of an LED, we first need to specify what pins the LED and potentiometer are connected to (digital pin 3 for the LED and analog pin A0 for the potentiometer). So we create a variable for each and set those values:
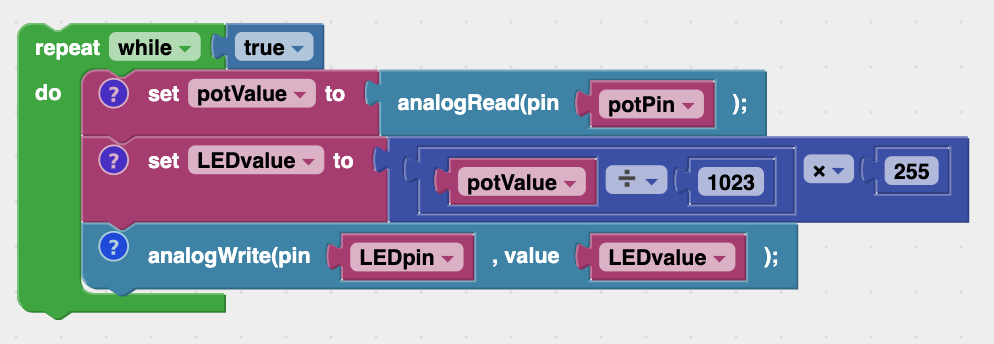
We therefore take the potentiometer value and divide it by 1023 to get the fraction of its max value. For example, if the potentiometer value is 512, then it's at half value. Or in numbers, 512/1023 is about 0.5. Then we muliply this number by 255 to get the corresponding value for the LED. For example, 0.5 times 255 is about 128, or about half brightness. Here's what it looks like in the code:
Finally, we have to remember that we need to check the potentiometer continually, because as the user turns the knob on the potentiometer, the voltage will change. Therefore we need to put these last three code blocks into a repeat while loop:
This loop will run continuously, constantly reading the potentiometer's voltage value and changing the LED's voltage to a corresponding value. So as the user turns the knob on the potentiometer the brightness of the LED will change. To start the program, click the Run button. To stop the loop, click the Reset button.
|


Control the LED's brightness using a Potentiometer. When you turn the potentiometer, the LED light will become brighter or dimmer. |